User Guide
Instructions on using TymeLink
Upgrade Booking Plan
Steps To Upgrade Plan
1.) Log into your TymeLink account
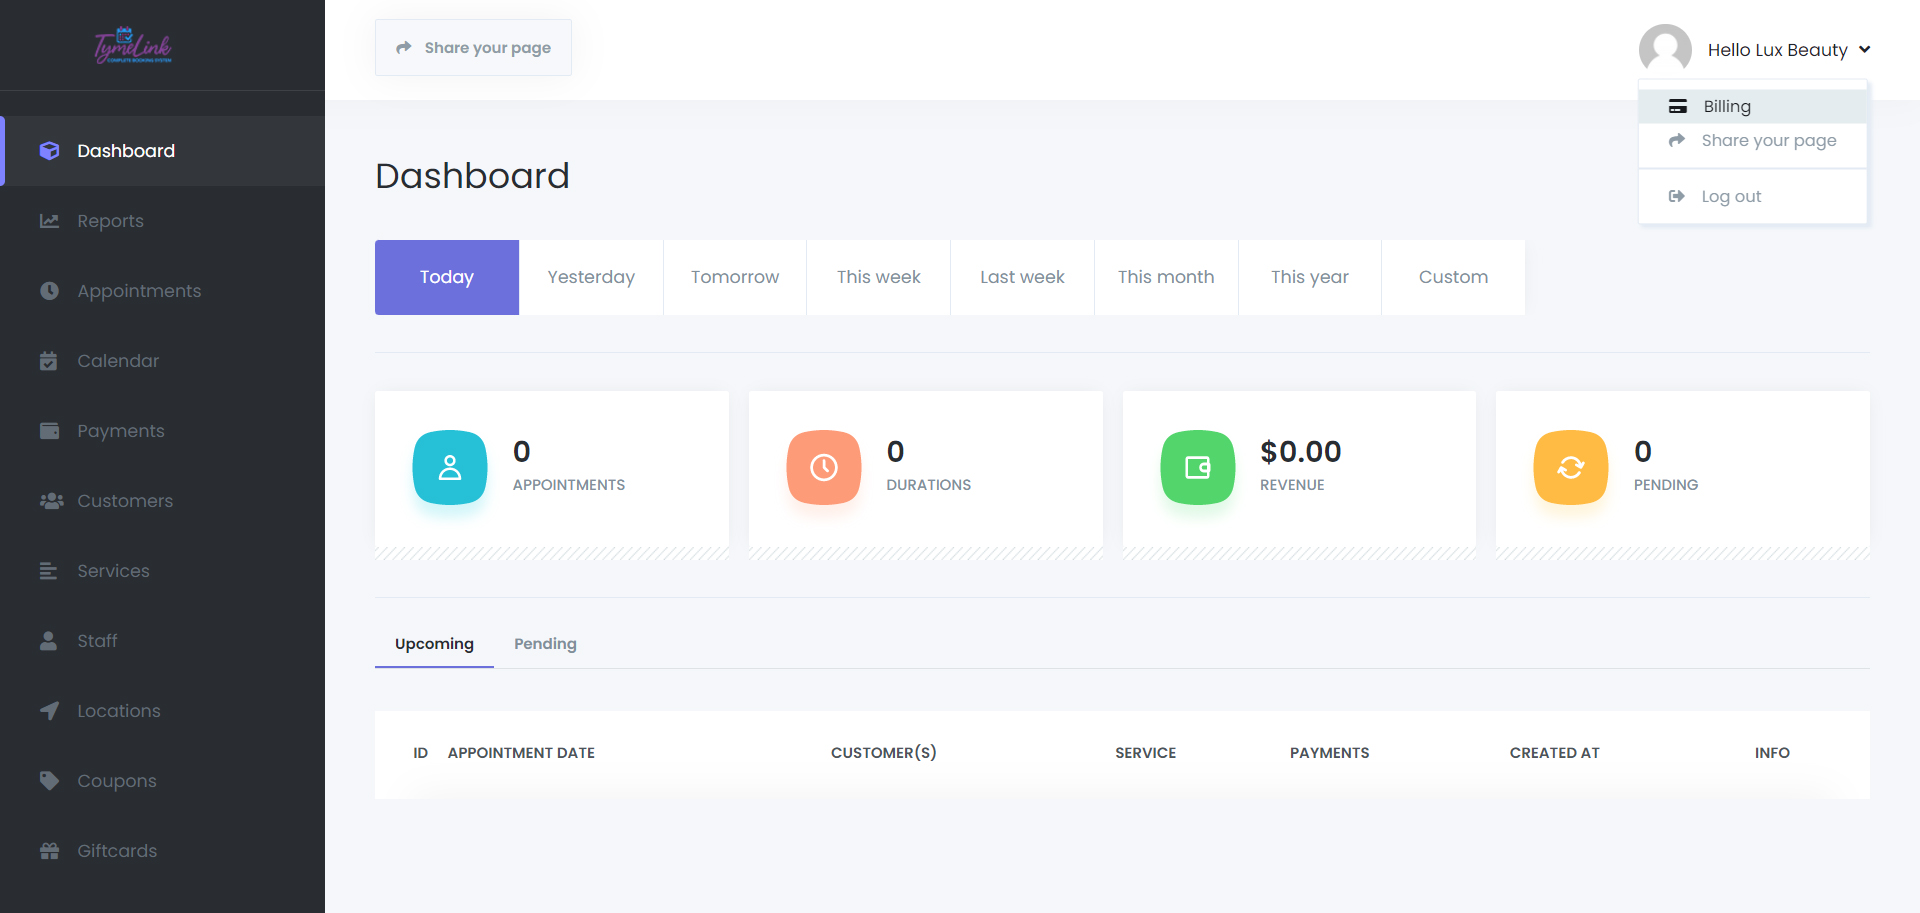
2.) Click the name assigned to your account located in the top right corner
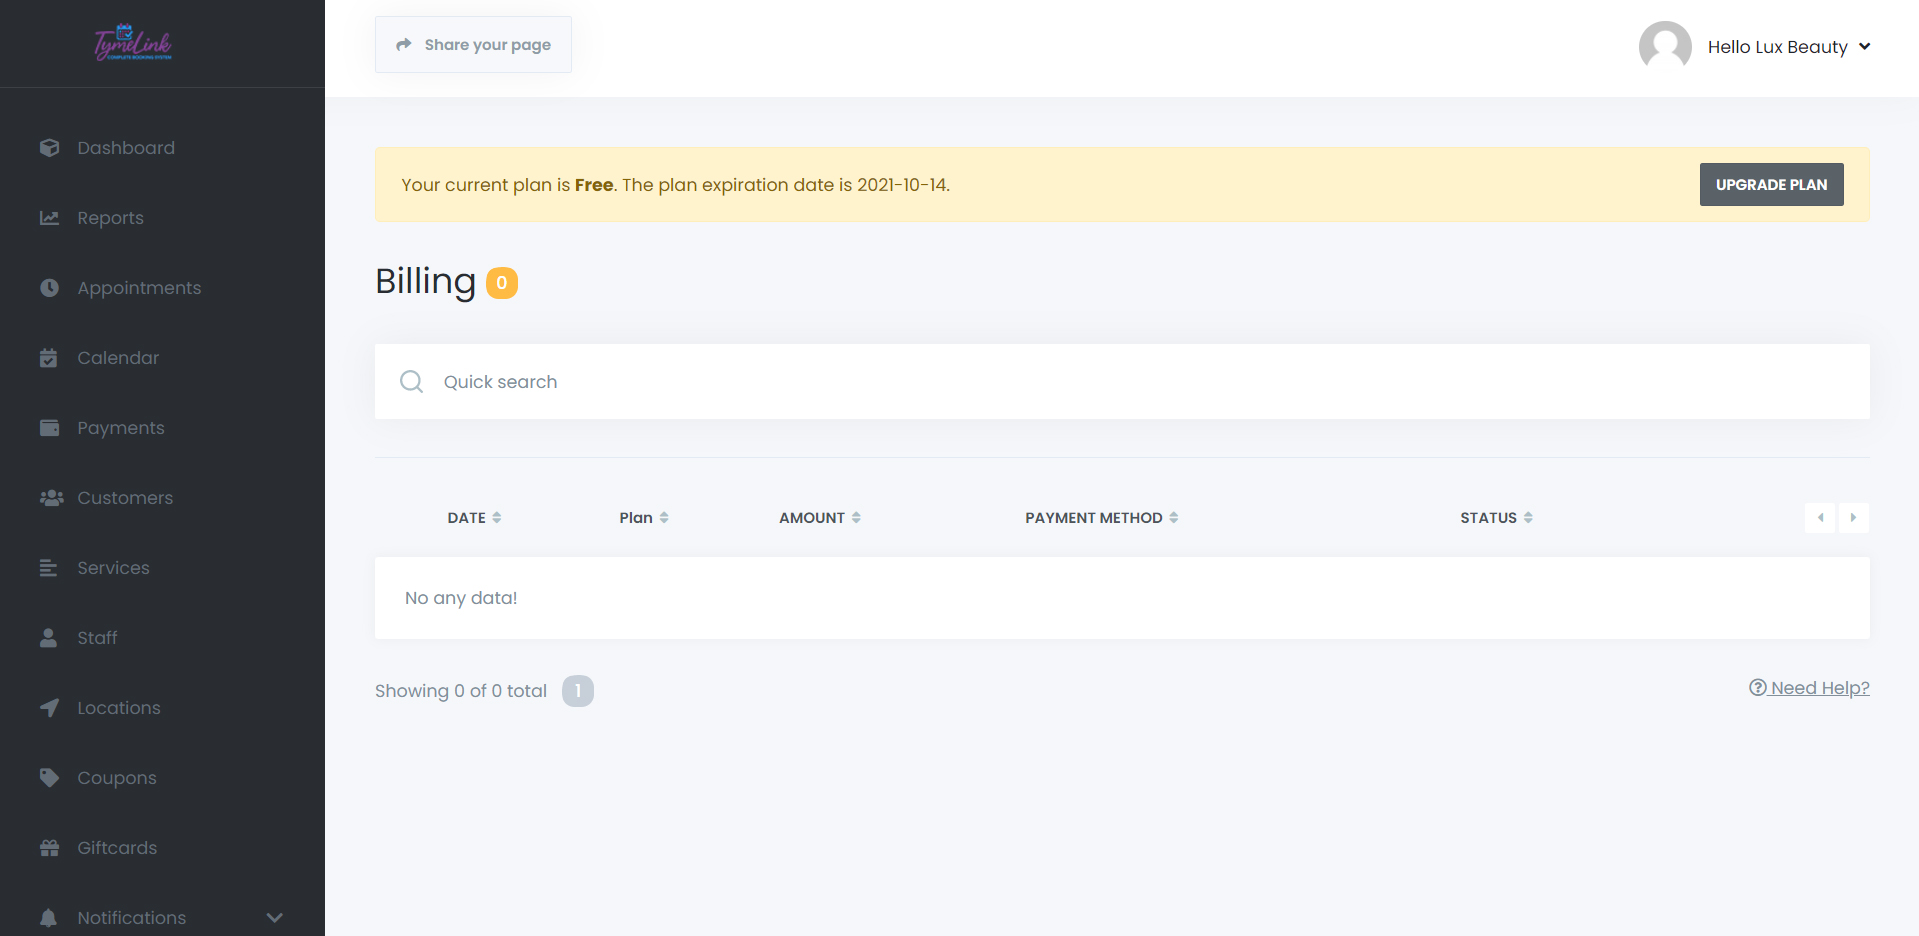
3.) Select “Billing”
4.) Select “Upgrade Plan”
5.) Choose to pay Monthly or Annually
6.) Select the plan best suitable for you
7.) Enjoy!
Payment Integrations
In order to accept deposits/payments, a payment system (Stripe, PayPal etc.) must be connected.
Connect Stripe Account
1.) Log into your TymeLink account
2.) Go to settings
3.) Payment Settings
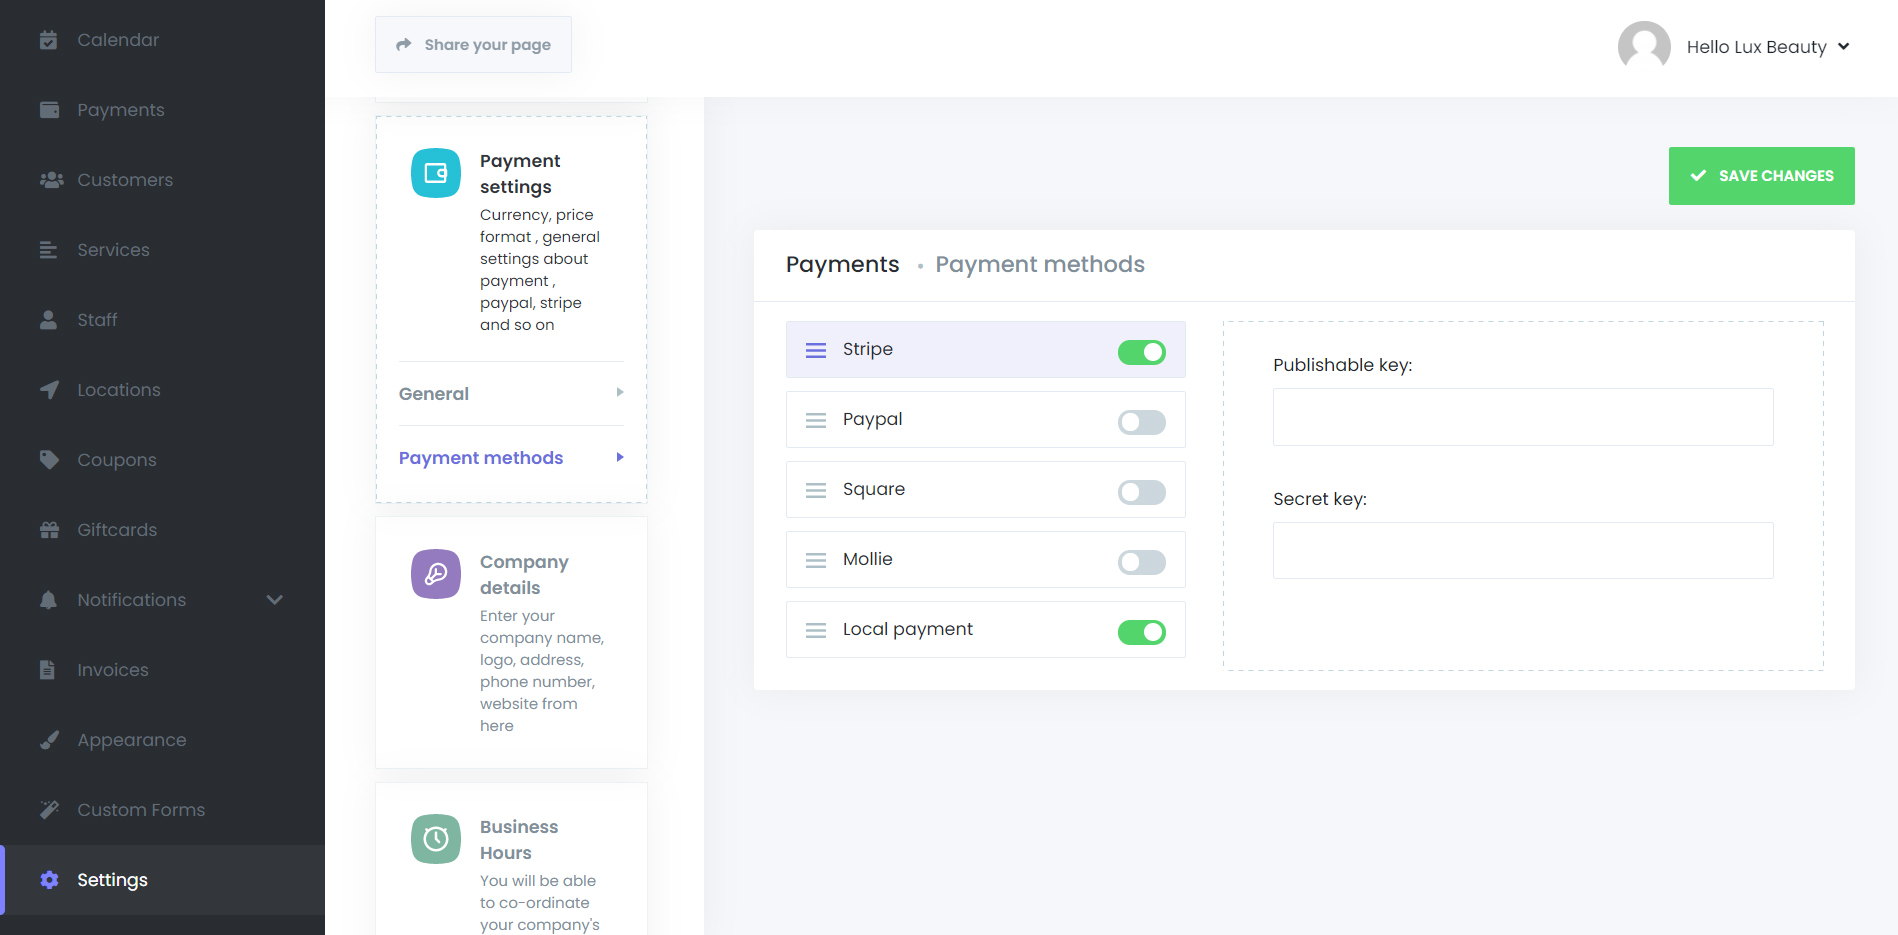
4.) Under Payment Settings select Payment Methods
5.) Toggle on Stripe
6.) Enter Stripe’s credentials for the account where payments will be received.
Find Stripe Publishable Key and Secret Key
1.) Log into your Stripe Account
2.) Make sure you’re in your Stripe’s Dashboard (https://dashboard.stripe.com)
3.) Click “Developers” tab
4.) Click “API Keys“
5.) Make sure you’re viewing Stripe’s Live API keys and not Test mode keys. The Test mode keys are only for testing purposes.
6.) Copy Publishable Key
7.) Select Reveal Live Key for the Secret Key if not revealed already. Note: Stripe usually only reveal Secret Key one-time so make sure you store the secret key in a safe and secure place
8.) All done!
Connect PayPal Account
2.) Go to Settings
3.) Payment Settings
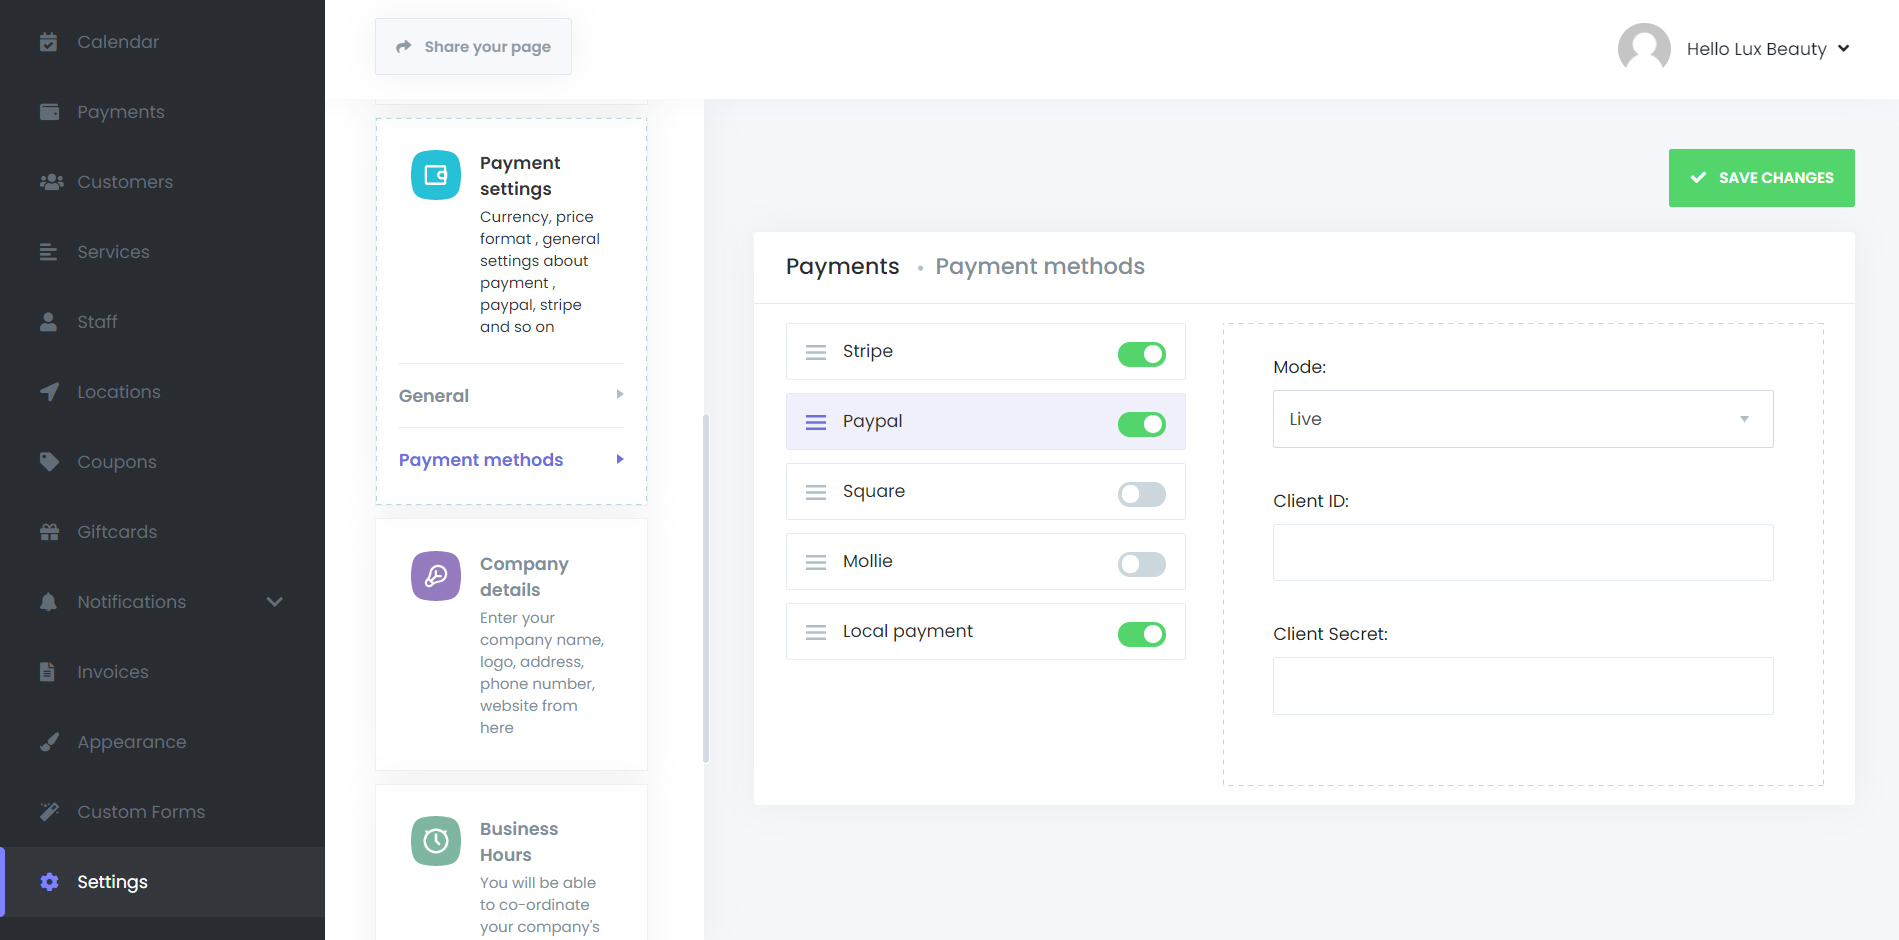
4.) Under Payment Settings select Payment Methods
5.) Toggle on PayPal
6.) In the PayPal box, select Live as the Mode. Note: Sandbox is for testing purposes
7.) Enter PayPal’s credentials for the account where payments will be received
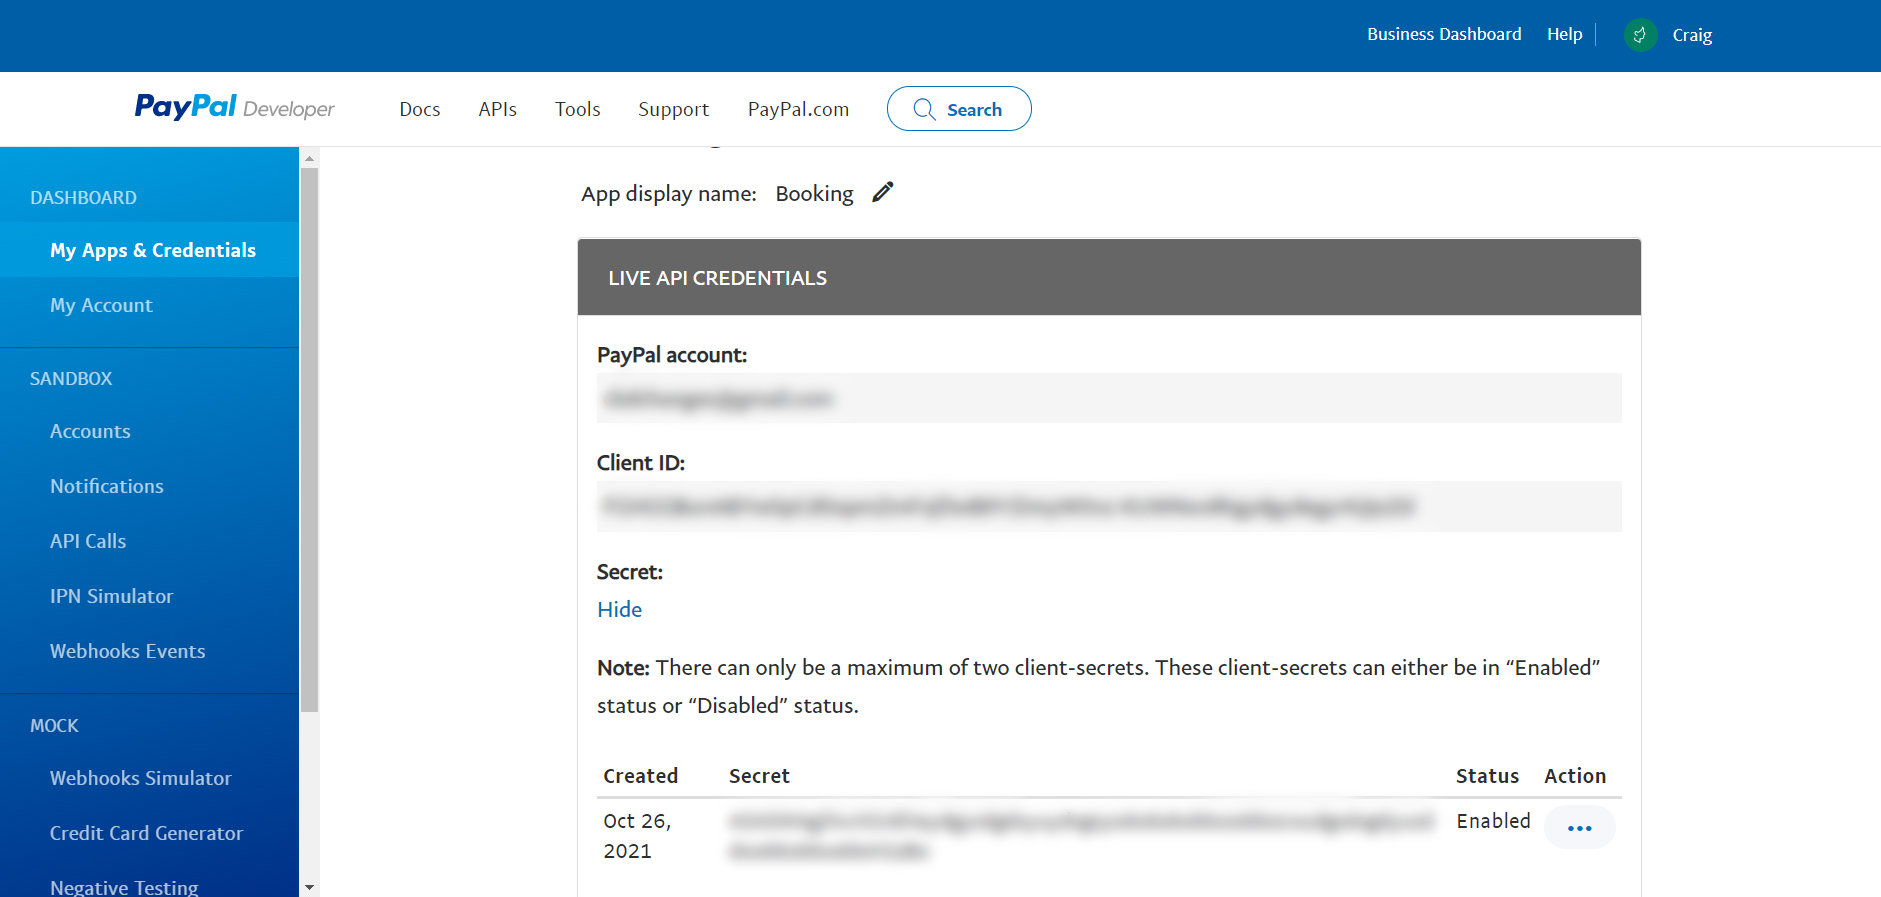
Find PayPal Client Id and Client Secret
1.) Log into your PayPal Business Account
2.) Make sure your PayPal account is Business Account and not personal account
3.) Click “Developer” tab
4.) Hover over your name and select Dashboard which directs you to the “Apps and Credentials” page
5.) Toggle switch to Live if the toggle is in sandbox mode
6.) Select Create App
7.) Give the app a name so you could know where the credentials will belong to then select Create App to finalize the app
8.) Copy Client ID key
9.) Select Show to reveal Secret key if not revealed
10. Copy Secret key
11.) All done!
Connect Square Account
2.) Go to Settings
3.) Payment Settings
4.) Under Payment Settings select Payment Methods
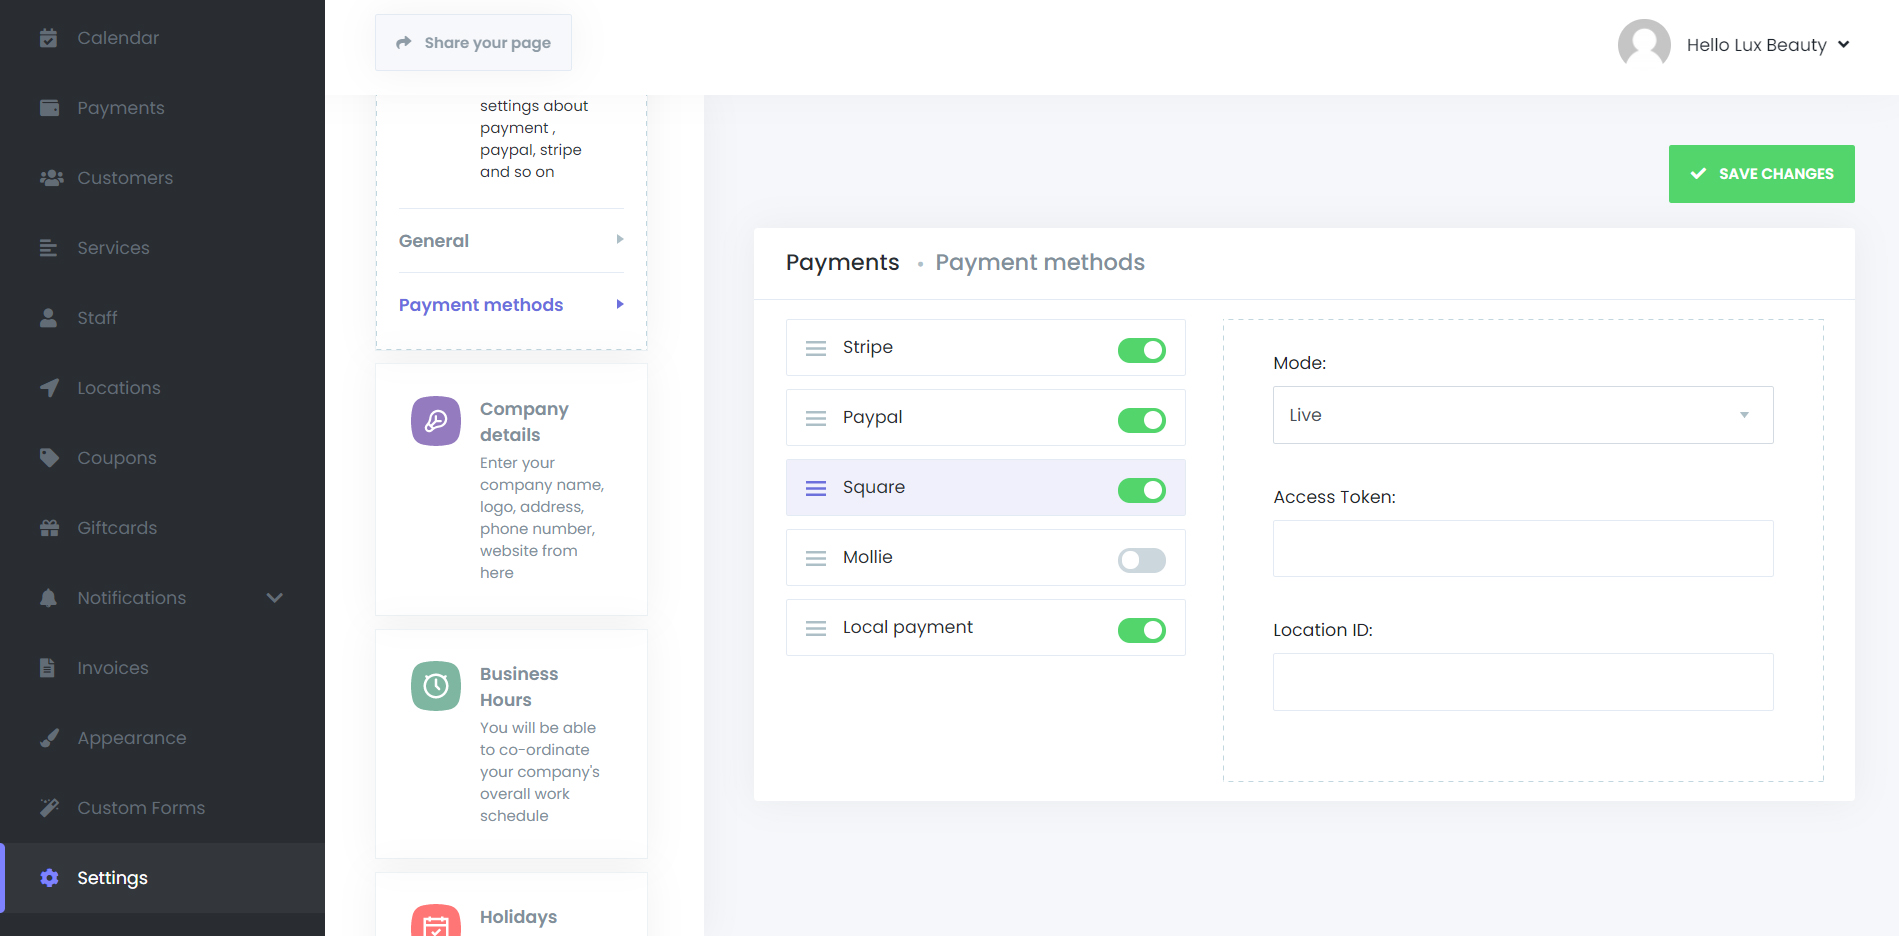
5.) Toggle on Square
6.) In the Square box, select Live as the Mode. Note: Sandbox is for testing purposes
7.) Enter Square’s credentials for the account where payments will be received
Find Square Client Id and Client Secret
1.) Go to https://squareup.com/developers
2.) Sign in using your SquareUp login credentials if not already logged in
3.) After signing in, click Developer Dashboard under the Account tab
4.) Click on the sign: + to add New Application
5.) Give an Application Name for you to remember
6.) Select Open after Application is created
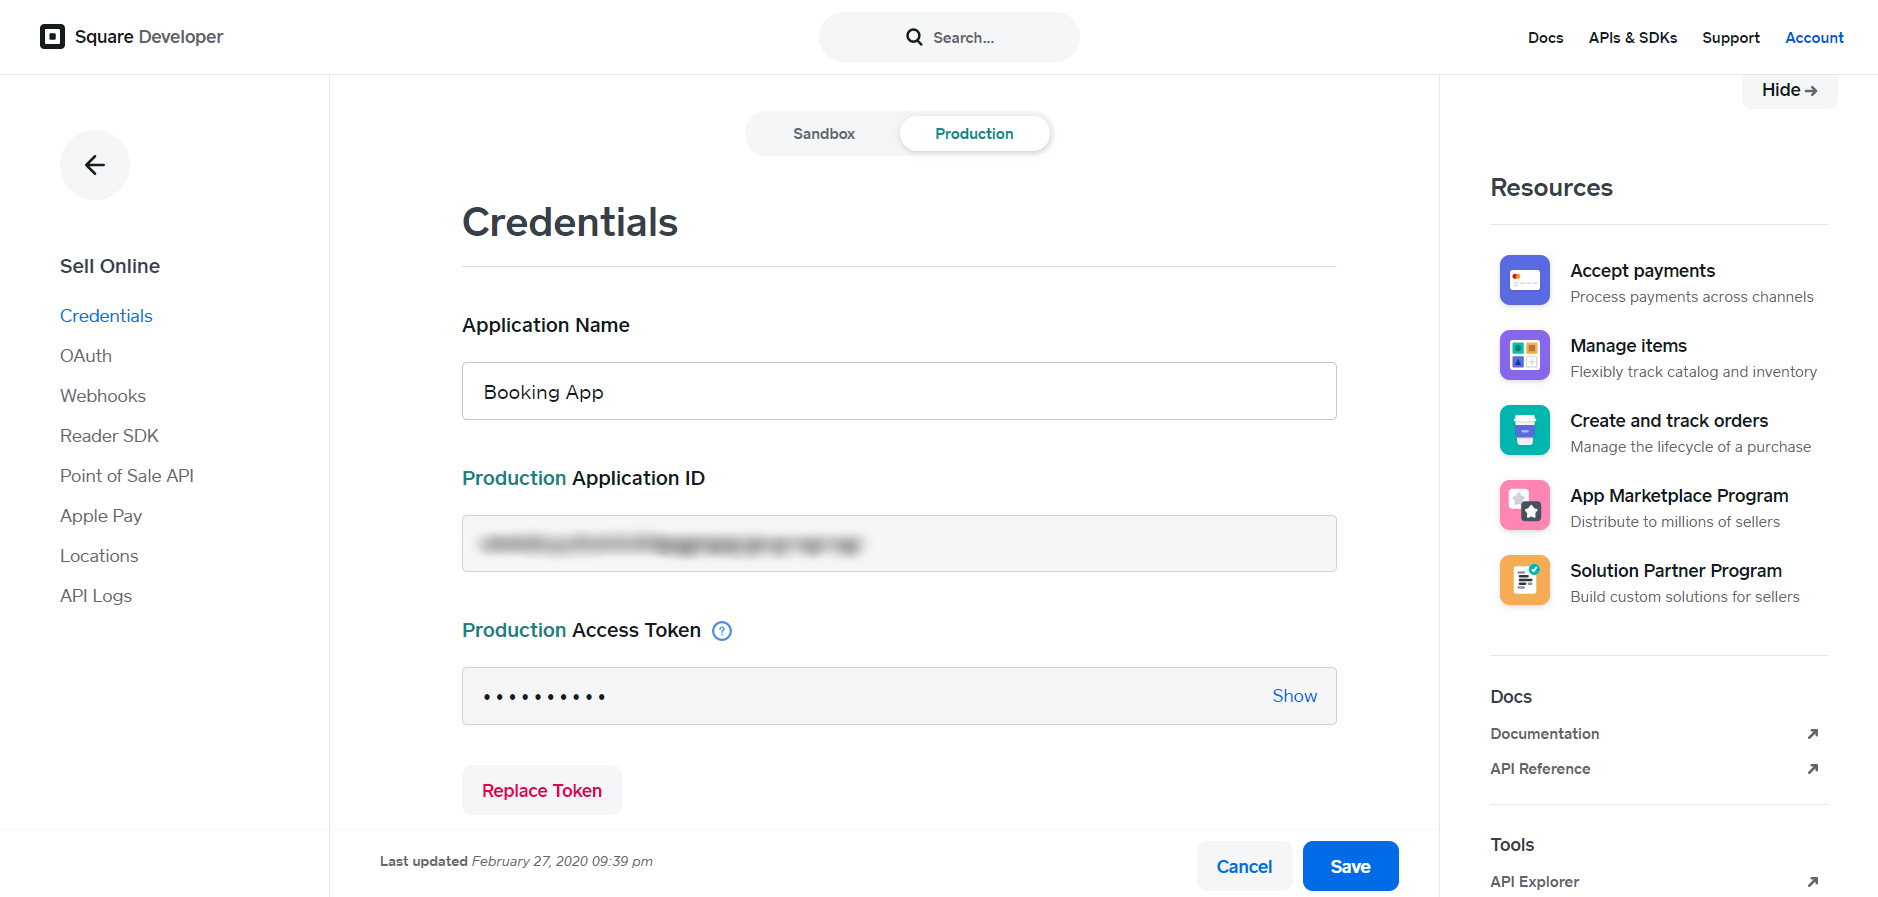
7.) Toggle tab to Production to reveal the Production Application ID key
8.) Copy Production Application ID
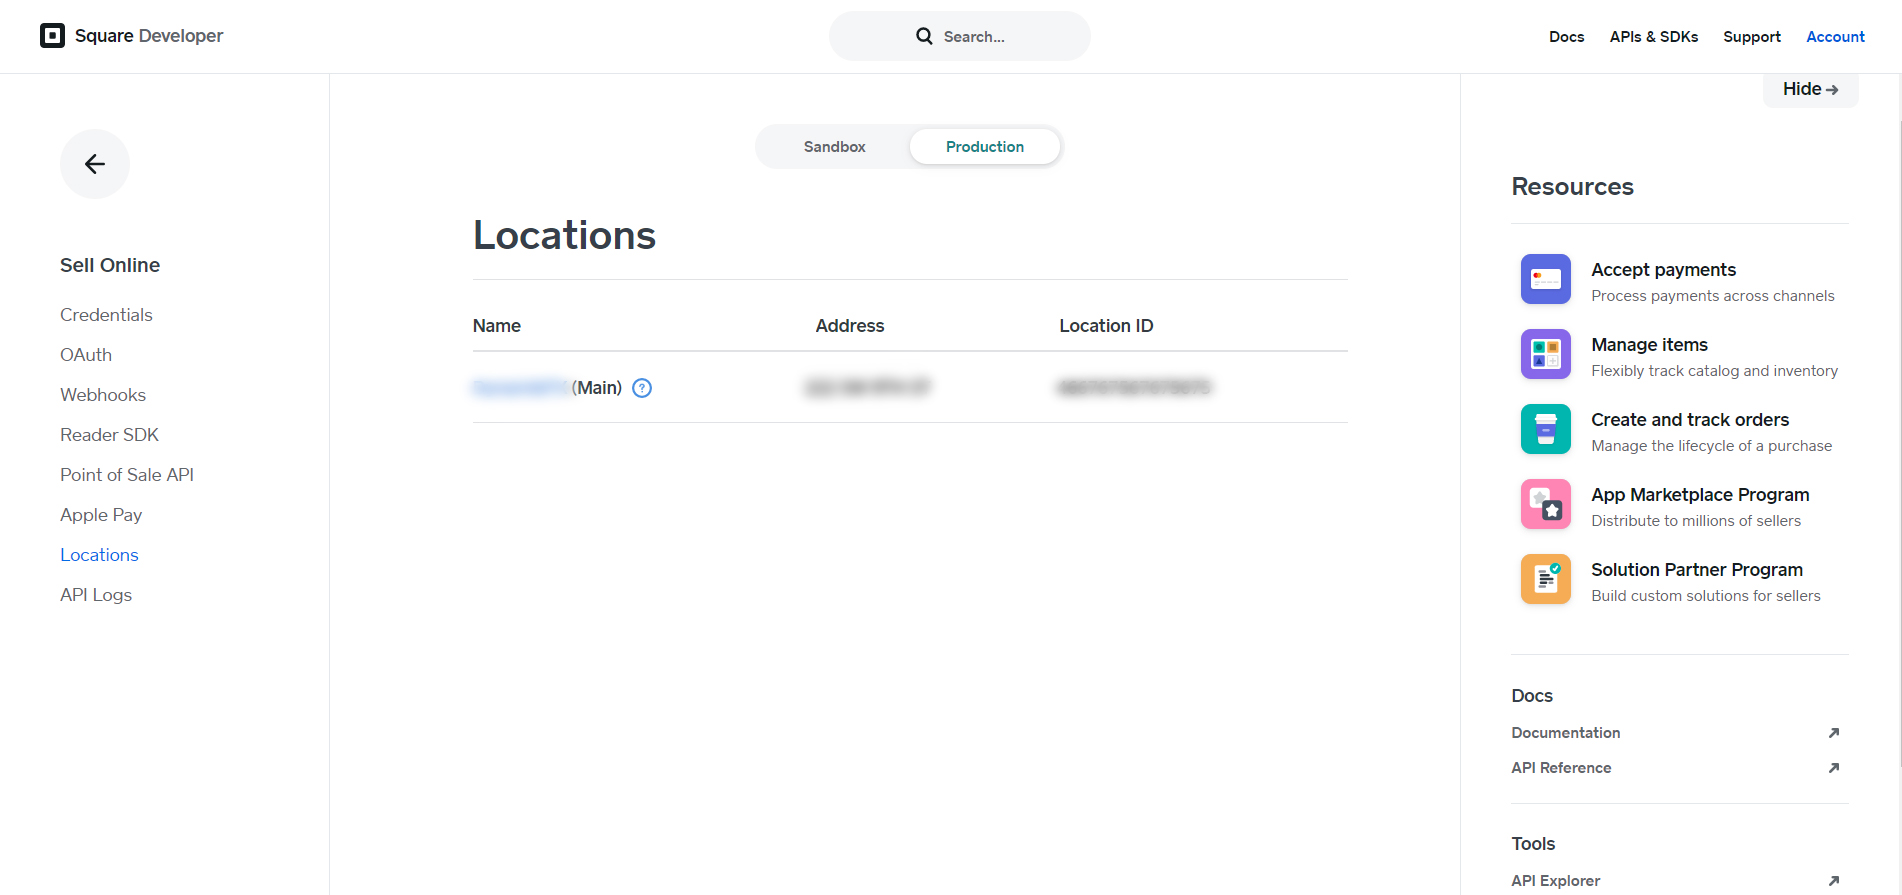
9.) Click on Locations tab
10.) Copy Location ID key displayed under Location ID
11.) All done!

